
I’m a self‑driven, results‑focused professional with a broad skill set and a proven history of delivering meaningful impact. I don’t just provide solutions; I actively pursue them. When I don’t have an answer or direction, I research, test, and uncover it. My priority is helping organizations grow, perform, and succeed through competence, adaptability, and strategic execution.
Engineering, Technical Experience & Services
Phone: 661-365-5792
-
Product R&D and Product Management, Design for Manufacturing (DFM) across Consumer Electronics, Pro/Commercial environments for Audio‑Video, Security, Home Automation, LED Lighting, AC/DC Power, Wired/Wireless Networking, and IP/PoE systems. Experienced in taking hardware and software designs from proof‑of‑concept through full product launch.
-
Value‑Added Product Solutions Engineer with deep expertise in creating innovative, market‑ready solutions.
-
Electronic Engineering, Technical CAD drawings, and Consulting for product development, system architecture, and engineering documentation control/management.
-
Residential and Pro Audio/Commercial AV, Lighting, Security and Automation System Integration, including technical design, system layout, and implementation strategies for new construction projects and retrofits.
-
Creation and design of product catalogs, brochures, technical literature, instruction manuals with detailed product information/ technical specifications, packaging, website technical information/diagrams, and application notes.
-
UI/UX Design for intuitive, user‑focused interfaces across hardware and software platforms.
-
Development of technical training materials and support documentation for sales teams, trade shows, and partner education.
-
Creation of technical concepts, imagery, and presentations for customer engagement, email campaigns, LinkedIn content, training, and marketing initiatives.
-
Marketing support through technical resources, product insights, and strategic guidance to strengthen brand awareness and identify key markets and customer segments.
-
Extensive familiarity with industry leaders in AV and home automation products, systems, and technologies.
Please Note! This website is constantly in flux and a work in progress and is being updated, modified on a reqular basis.

Rack Designs: Rack Systems & Hardware. Cable, Thermal & Power Management for Home A/V, Home Automation Systems
Home AV & Automation Sytems, General Installation Information and Considerations:
Designing an audio-video home automation system begins with a careful blend of technical planning and lifestyle mapping. The process involves assessing the size and layout of each installation, understanding the entertainment needs of its occupants, and selecting devices that integrate seamlessly—from speakers and smart displays to streaming hubs and control interfaces. Choosing a centralized control system, whether app-based, voice-activated or both that ensures convenience and a future-proof foundation. Wiring, network strength, and compatibility with existing smart devices are also key considerations during the setup phase, laying the groundwork for a cohesive, immersive experience that responds to your voice, habits, and routines. The install needs to provide the proper physical space for the installation of the racks, cabling and future enhancements, expansion of hardware and future technology. The ability to properly service the system when required. The system should be neat organized for proper cooling and all cabling should be properly managed, labeled with proper power current needs are address for existing hardware and additional hardware as needed in the future.
Project Bid, Management and System Design Software:
Why Project Bid Software Matters
-
Accurate Proposals: Automatically generate quotes with real-time product pricing and labor estimates.
-
Professional Presentation: Create sleek, informative multimedia-rich proposals that impress clients and close deals faster.
-
Error Reduction: Avoid missing items in the bill of materials (BOM), which can lead to costly mistakes.
-
Version Control: Track revisions and client feedback without losing data or duplicating work.
Importance of System Design Software
-
Visual Planning: Build 2D/3D diagrams, rack elevations, and wiring schematics to visualize the entire system.
-
Integration Accuracy: Ensure compatibility between AV, lighting, climate, and security systems.
-
Standardization: Use industry-specific symbols and templates to maintain consistency across projects.
-
Simulation & Testing: Some platforms allow acoustic modeling and performance simulations before installation.
-
The client is able to see all the system hardware, wiring routing and all the technologies used in the project with accuracy of all the physical locations related to the installation from start to finish, and udated as needed with any ongoing changes or updates.
Project Management Software Benefits
-
Task Tracking: Assign responsibilities, set deadlines, and monitor progress across teams.
-
Collaboration: Keep designers, installers, and sales teams aligned with real-time updates and shared dashboards.
-
Resource Allocation: Manage labor, inventory, and scheduling to avoid bottlenecks.
-
Client Satisfaction: Deliver on time, within budget, and with fewer surprises—boosting trust and referrals.
Why It All Comes Together
Using specialized AV software like D-Tools, XTEN-AV helps integrators:
-
Eliminate manual errors and miscommunication
-
Speed up design and approval cycles
-
Maintain profitability by avoiding cost absorption from overlooked items
-
Stay competitive with automation and data-driven insights
Home AV & Automation Sytems Designs and Considerations from a System Integrator’s Perspective:
Planning and setting up an audio-video home automation system requires a holistic approach to technology and user experience. It starts with evaluating the client’s space—taking into account room acoustics, lighting conditions, and wiring paths—to design a scalable infrastructure. We define the AV zones, identify control needs, and select interoperable devices that integrate into a unified ecosystem. Our goal is to balance performance, aesthetics, and usability—whether that means discreet speaker placement or seamless switching between media sources. Network resources, stability, remote access, and future expansion are factored in early to ensure the system remains robust and intuitive as the client’s needs evolve.
Rack Design:
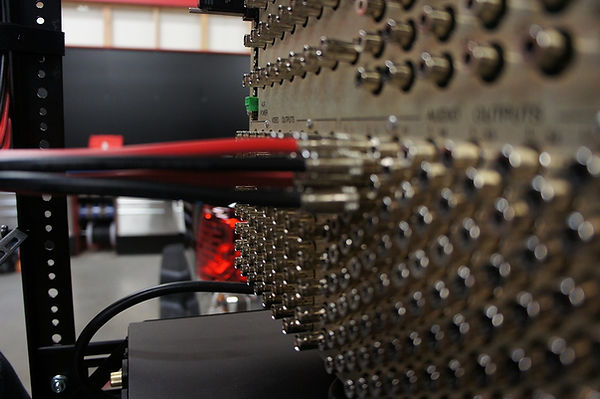
The planning and setup of an audio-video home automation system is both a technical and strategic endeavor—one that begins with assessing client needs, architectural constraints, and long-term scalability. Key to the process is designing a centralized AV equipment rack that serves as the system’s heartbeat. This involves selecting high-quality components, allowing for proper ventilation and cable management, and anticipating future integrations. The rack must accommodate amplifiers, matrix switchers, control processors, wired and wireless network and power management systems, all wired for accessibility, reliability, and peak performance. Every detail, from thermal considerations to labeling standards, is mapped out to ensure seamless deployment and ongoing support.

Important System/Project & Schematic Documents that are common in most installations
System‑Level Planning Documents
These define the overall architecture, scope, and intent of the system before any wiring or device placement is finalized.
1. Scope of Work (SOW):
Describes system goals, included rooms/zones, equipment categories, responsibilities, and deliverables.
2. Bill of Materials (BOM) / Equipment List:
Itemized list of all hardware, quantities, models, and accessories required for the project.
3. System Narrative / Design Intent:
Explains how the system functions from the user’s perspective—audio zones, video distribution, automation logic, network structure, etc.
4. Budgetary Estimate / Proposal Package:
Cost breakdown aligned with the SOW and BOM.
Floor‑Plan‑Based Drawings:
These show where devices physically live in the home.
5. Device Location Plans:
Placement of speakers, TVs, touchscreens, cameras, Wi‑Fi access points, sensors, racks, and keypads.
6. Reflected Ceiling Plan (RCP):
Shows ceiling‑mounted devices such as speakers, projectors, CCTV cameras, touchscreens, sensors, and lighting control loads.
7. Low‑Voltage Plan:
Identifies types of cable drops, structured wiring panels, conduit runs, and pathways.
8. Conduit & Pathway Drawings:
Shows smurf tubing, ENT, raceways, and pull‑paths for future‑proofing.
Wiring & Connectivity Documentation
These documents guide technicians during rough‑in, trim, and final installation.
9. Cable Schedule / Wire Index:
Lists every cable run, its type, origin, destination, and purpose.
10. Home‑Run / Structured Wiring Panel Layout:
Shows how all cables terminate at the rack or wiring panel.
11. Point‑to‑Point Wiring Diagrams:
Detailed connection maps showing exactly which port connects to which device.
12. Termination Standards:
RJ45 pinouts, speaker polarity, fiber termination notes, labeling conventions, and color codes.
Rack & Equipment Documentation. These documents define how the head‑end is built and serviced.
13. Rack Elevations:
Front and rear views showing equipment order, spacing, ventilation, and cable entry points.
14. Rack Wiring Diagrams:
Shows how devices inside the rack interconnect (network, audio, video, control, power).
15. Power Distribution Layout:
UPS, power conditioners, PoE switches, load balancing, and circuit assignments.
Network & Control System Documentation
Critical for modern AV/automation systems that rely heavily on IP.
16. Network Topology Diagram:
Switches, VLANs, subnets, DHCP/static assignments, firewall rules, and device grouping.
17. IP Addressing Table:
Lists all devices, MAC addresses, static IPs, hostnames, and login credentials (stored securely).
18. Control System Architecture:
Shows processors, gateways, touch panels, remotes, and communication paths (IP, RS‑232, IR, Zigbee, Z‑Wave, Matter, Thread).
19. Automation Logic Flowcharts:
Lighting scenes, HVAC schedules, security triggers, AV macros, and conditional logic.
🎛 Audio/Video Engineering Documents
These define signal flow and system behavior.
20. Riser Diagram:
High‑level vertical system overview showing how racks, floors, and rooms interconnect.
What Riser Documentation Is?
A riser diagram (or riser document) is a top‑down or vertical schematic that illustrates how equipment racks, floors, rooms, and system components are interconnected. Instead of showing every cable, it shows the signal paths, network topology, and device relationships between major system elements.
It’s commonly used in:
-
AV system design
-
Home automation and control systems
-
Security, CCTV, access control
-
IT and network infrastructure
-
Multi‑floor or multi‑room projects
21. Signal Flow Diagrams:
Audio, video, and control signal paths from source → matrix → amplifier → endpoint.
22. DSP Programming Sheets:
Input/output routing, EQ, crossovers, delay, gain structure, and presets.
23. Video Distribution Maps:
HDMI/AVoIP routing, EDID management, bandwidth requirements, and switch configuration.
Security, Surveillance & Access Control Documents
For homes with integrated security systems.
24. Camera Layout & Coverage Maps:
Field‑of‑view diagrams, lens selection, and blind‑spot analysis.
25. Security System Wiring Diagrams:
Door/window contacts, motion sensors, glass break sensors, sirens, and panel wiring.
26. Access Control Schematics:
Gate controllers, door strikes, keypads, and intercom pathways.
Programming, Commissioning & Handoff Documents
These ensure the system is supportable long‑term.
27. Programming Files & Backups:
Control system code, DSP files, switch configs, and firmware versions.
28. Test & Verification Reports:
Network tests, audio calibration logs, video bandwidth tests, and device commissioning checklists.
29. As‑Built Drawings:
Updated drawings reflecting the final installed system.
30. User Guides & Training Materials:
Custom manuals, quick‑start guides, and system overview documents for the homeowner.
Optional but Highly Valuable Documents
These elevate the professionalism of the project.
31. Heat Load & Ventilation Calculations:
Ensures racks and enclosed spaces meet thermal requirements.
32. Wi‑Fi Heat Maps:
Predictive or post‑installation wireless coverage analysis.
33. Cable Labeling Index:
Defines labeling scheme for future serviceability.
34. Maintenance & Service Plan:
Defines support tiers, firmware update schedules, and remote monitoring.
A complete documentation package like this is what separates basic installers from professional AV/automation engineers. It also dramatically reduces service calls, installation errors, long‑term system failures and increases customer satisfaction.
Rack Buildout, Layout and Design


Power Cables
Audio-Video Cables
Networking Cables


1. General Rack Layout & Equipment Selection
-
Rack size: Choose height (e.g., 27U, 42U) based on current and future gear. Ensure it fits the installation space. If the Rack space is to small, make sure to use a Rack that can roll out for Service & Updates. Make sure there is proper lighting in the space for service techs and for the customer.
-
Rack accessories: Include shelves, blanking panels, cable management arms, and cooling fans.
-
Ventilation: Design for front-to-back airflow; consider active cooling if the rack is in an enclosed space.
-
If the rack is in a tight space and needs to roll out from a small closet or space, make sure there is enough extra cabling behind the rack, so it can move enough to gain access to the rear portion of the rack for service or future hardware changes or updates.
-
If the installation has a CCTV NVR or an AV Matrix switcher or other hardware with products that have a significant number of Audio-Video signals. It is always a good idea to have a monitor in the rack or on a wall in the rack location to view these sources when commissioning, testing the system, servicing or troubleshooting Audio-Video related signals.
2. Power Management
-
Make sure that there is sufficient AC power current/wattage is available at the location where the rack will be installed to power up all the equipment that will be used in the rack with at least min 50% more than is required. If significant future expansion of the system is foreseeable in the future then additional power requirements should be considered and planned for.
-
UPS and surge protection: Protect sensitive gear from outages and spikes.
-
Sequenced power distribution: Use smart PDUs to power on devices in the correct order (e.g., amplifiers last).
-
Cable labeling and routing: Keep power and signal cables separate to reduce interference.
-
Power management for devices that need rebooting to correct technical issues.
3. Thermal Management
Active & Passive Cooling Research has shown that implementing thermal management techniques can increase the lifespan of AV equipment by as much as 30%.
Prioritize Airflow
-
Front-to-back airflow is ideal match for equipment with similar airflow patterns.
-
Leave ventilation gaps (1U or more) between heat-generating components.
-
Use blanking panels to prevent hot air recirculation in unused rack spaces.
Use Active Cooling
-
Install rack-mounted fans or ventilation units at the top (hot air rises).
-
Consider rear-door fans or side-mounted blowers for deeper racks.
-
For high-density setups, integrate dedicated HVAC or ducted exhaust systems
-
Active Cooling Manufactures: AC Infinity, Active Thermal Management, Procool.
Smart Equipment Placement
-
Place high-heat devices (like amplifiers, receivers or servers) near the top.
-
Keep sensitive or low-heat gear (like control processors) lower down.
-
Avoid stacking multiple hot devices directly on top of each other.
Monitor and Manage Temperature
-
Use temperature sensors and remote monitoring tools to track heat levels.
-
Set up alerts for temperature thresholds to prevent thermal runaway.
Follow AVIXA Standards
-
The AVIXA Rack Building Standard recommends keeping internal temps below 85°F (29.4°C).
-
Design with thermal zones in mind and coordinate with HVAC pros early in the process for proper active cooling solutions.
Additional Information
-
Use vented shelves and open-frame racks when possible.
-
Keep cable management tidy, clutter can block airflow.
-
Setup a service plan with your client to regularly clean filters and fans to maintain air flow efficiency.
It is important to calculate the BTU requirements for cooling a rack space or room, consider factors like room size, equipment heat output, and occupancy. More information on BTU calculations can be found on the web, Click Here
4. Copper Cable Management
Planning & Design
-
Map cable paths early: Plan routes for power, signal, and network cables before installation.
-
Separate by type: Keep power cables apart from signal/data cables to reduce interference.
-
Allow for growth: Leave space and pathways for future expansion.
Bundling & Routing
-
Use structured pathways: Employ vertical/horizontal lacing bars, cable trays, or ducts.
-
Bundle logically: Group cables by function (audio, video, control, network).
-
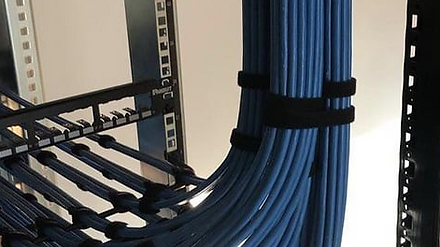
Avoid over-tightening: Use Velcro ties instead of zip ties to prevent crushing the copper conductors.
-
Maintain bend radius: Follow manufacturer specs (typically 4x cable diameter for Cat6/7) to avoid signal loss.
Labeling & Documentation
-
Label both ends: Every cable should be clearly marked at both terminations.
-
Consistent scheme: Use a standardized labeling system (rack unit, device, port).
-
Maintain diagrams: Keep updated rack elevations and wiring schematics for serviceability.
Airflow & Accessibility
-
Don’t block ventilation: Route cables so they don’t obstruct fans or airflow paths.
-
Service loops: Leave a little slack (not excess) to allow rack roll-out or hardware device replacement.
-
Rear access: If possible, design racks with rear access or swing-out frames for easier cable service.
5. Fiber-Optic Cable Management
Fiber optic cable management for use in AV racks require extra care compared to copper because fiber is more delicate and performance can be compromised by improper handling and installation. Here’s a clear outline of best practices to keep your rack cabling layout reliable, serviceable, and standards compliant.
Planning & Design
-
Plan pathways early: Define routes for fiber separate from copper and power to avoid interference and clutter.
-
Use dedicated fiber trays: Incorporate fiber management panels, patch trays, and enclosures designed for bend-radius protection.
-
Allow for growth: Leave space for future fiber runs and additional patching capacity.
Routing & Bend Radius
-
Respect bend radius: Never exceed the minimum bend radius (typically 10x the cable diameter for static, 20x for dynamic).
-
Avoid sharp angles: Use radius guides, spools, or brackets to maintain smooth curves.
-
Prevent stress: Don’t pull or twist fiber; use proper pulling grips and avoid tight bundling.
Labeling & Documentation
-
Label both ends: Clearly mark each fiber strand or connector with a consistent scheme.
-
Color coding: Use industry-standard connector colors (e.g., blue for single-mode, aqua for multimode OM3/OM4).
-
Maintain records: Keep updated rack diagrams and fiber maps for quick serviceability and troubleshooting.
Airflow & Accessibility
-
Keep fibers clear of fans: Route cables so they don’t obstruct cooling airflow.
-
Service loops: Leave controlled slack (service loops) for maintenance but avoid excessive coiling.
-
Accessible design: Use swing-out or sliding fiber trays for easy access during moves, adds, or changes.
6. Network Infrastructure
-
Choose the appropriate Routers, managed switches and Wi-fi Hardware resources based on the project needs. This includes mounting considerations, ethernet ports required for hard wired devices and what devices may require PoE powered ports.
-
Patch panels and switches: Mount network gear with clear cable paths for structured UTP cabling for clean terminations.
-
Wi-Fi and VLAN planning: Ensure robust wireless coverage and segment traffic for AV, automation, and guests.
-
Proper Cabling and Connectors to meet current specifications of the network hardware used.
-
Provide one or more RJ45 Jack/s on the front of the rack for a service port for technicians to use when servicing or troubleshooting systems on the network.
7. Automation Integration
-
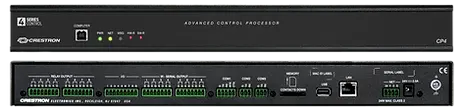
Controller placement: Centralize automation processors (e.g., Control4, Crestron,Elan, RTI, Savant, Josh.AI).
-
Interface modules: Include IR, serial, or IP interfaces for device control.
-
Remote access: Enable secure remote diagnostics and updates.
8. Audio Amplifiers (Placement)
-
For optimal thermal management, audio amplifiers are typically installed at the bottom of the equipment rack—a practice widely endorsed by audiophiles and AV engineers. This placement promotes efficient heat dissipation, enhances airflow, and minimizes the risk of overheating, which can degrade amplifier performance and compromise overall system reliability.
9. Assembly & Testing
-
Bench test: Pre-wire and test all gear before final rack assembly.
-
Label all cabling for easy identification and physical terminations end points.
-
Cable dressing: Use Velcro, lacing bars, and cable combs for a professional finish.
-
Documentation: Create rack elevation diagrams, wiring schematics, and IP address maps.
10. Installation & Commissioning
-
Secure mounting: Bolt the rack to the floor or wall if needed.
-
System calibration: Fine-tune audio, video, and automation settings.
-
Client training: Walk the homeowner through system use and maintenance.
-
Provide Basic System Instruction Manual with proper contact info for support resources or build a Help system that is available on their phones or Touchscreen(s) GUI if applicable for easy access.
Solid Blank Rack Mount Panels
Black 19" Metal 1U, 2U, 4U
Used to cover unused rack spaces in equipment racks, providing both functional and aesthetic benefits. Their primary purpose is to maintain proper airflow, protect internal components, and create a clean, professional appearance in AV, IT, and security installations.
Cable Management Hardware
Cable Ties/ Velcrow Straps
Using wire ties and Velcro straps are the two most common approaches to AV‑rack cable management, and each one has clear strengths and tradeoffs depending on the environment, density, and serviceability requirements. The comparison below is written from an engineering and integrator perspective so it aligns with the way you design and document racks.

Wire Ties (Zip Ties)
Pros
-
Strong, permanent hold — Excellent for bundles that must stay locked in place, especially in high‑density racks or where cables cannot shift.
-
Clean, tight appearance — Creates very uniform, rigid cable bundles that photograph well and stay visually consistent.
-
Low cost — Ideal for large racks with hundreds of tie points.
-
Small footprint — Takes up minimal space, which is helpful in tight rear‑rack clearances.
-
Good for long‑term static installs — Once set, bundles remain stable even with vibration or movement.
Cons
-
Not service‑friendly, must be cut to remove, which risks damaging cables if a tech slips with flush cutters nicks insulation or worse cuts into the cable structure.
-
Can over‑compress cables — Overtightening can deform copper pairs, fiber jackets, or coax dielectric, causing signal issues.
-
Single‑use — Waste increases on large projects; not ideal for racks that require frequent changes.
-
Harder to reconfigure — Any change to the bundle requires cutting multiple ties and rebuilding the harness.
Best Use Cases
-
Permanent installations with low expected rework
-
Dense cable bundles that must stay rigid
-
Power cable runs (with proper spacing)
-
Structured wiring trunks and backbone bundles
Velcro Straps (Hook‑and‑Loop)
Pros
-
Highly serviceable — Easy to open, adjust, and re‑close without tools; ideal for racks that evolve over time.
-
Gentle on cables — Even pressure avoids crushing copper pairs or fiber jackets.
-
Reusable — Reduces waste and speeds up rework or upgrades.
-
Better for mixed‑diameter bundles — Conforms naturally to uneven cable groups.
-
Preferred for fiber — Eliminates micro‑bending risk and jacket compression.
Cons
-
Bulkier than zip ties — Can create thicker bundles, which matters in tight rear clearances.
-
Less rigid — Bundles can shift slightly if not anchored well.
-
Higher cost — More expensive per strap, especially in large racks.
-
Can lose grip over time — Dust, heat, and repeated use can reduce holding strength.
Best Use Cases
-
AV racks requiring frequent service or upgrades
-
Fiber optic cable runs
-
Mixed‑signal bundles (HDMI, CATx, control, audio)
-
Any rack where technicians need fast access
Side‑by‑Side Comparison

Practical Guidance for AV Racks
-
Use Velcro for all signal cables (HDMI, CATx, fiber, audio, control).
-
Use zip ties for power cables, but keep them separate per NEC and best practices.
-
For large trunks, use Velcro for the main bundle and zip ties for strain relief at fixed anchor points.
-
In service‑heavy environments (broadcast, enterprise AV, IT closets), Velcro is the standard.
-
In permanent architectural installs, zip ties can be used more aggressively.

Smurf Tubing (Overview for AV, Data, and Low‑Voltage Cabling)
Smurf tubing—often recognized by its flexible, corrugated blue construction—is a non‑metallic conduit designed to route and protect low‑voltage wiring. It’s widely used in both residential and commercial environments where cable protection, organization, and future accessibility are priorities.
Key Characteristics and Benefits
-
Cable Protection: The tubing shields wiring from physical damage, moisture exposure, and pests while keeping cable runs concealed and organized inside walls or ceilings.
-
Ideal for In‑Wall Routing: Its flexibility makes it easy to snake through framing, making it a popular choice for structured wiring pathways and clean installation practices.
-
Available in Multiple Diameters: Common sizes range from roughly ½ inch up to 2 inches, allowing installers to choose the right capacity based on the number and type of cables being pulled.
-
Compatible with Most Low‑Voltage Cabling: It works well for HDMI, Ethernet, speaker wire, control wiring, and other AV/data cables, making it a versatile solution across many system types.
-
Supports Future Upgrades: Because cables can be pulled in and out without opening the wall, smurf tubing provides an easy way to replace or add wiring as technology evolves.
Major Brands of Smurf Tubing
Carlon (ABB)
Carlon is the most recognized name associated with blue ENT. Their Flex‑Plus Blue™ tubing is lightweight, flexible, and designed for walls, floors, slabs, and ceilings. It’s available in sizes from ½″ to 2″ and includes a full line of compatible fittings.
IPEX / Kwikon
IPEX manufactures Kwikon ENT, another widely used brand in electrical and low‑voltage installations. Kwikon ENT is available in multiple diameters (½″, ¾″, 1″, etc.) and is sold in reels or cut lengths. It’s commonly stocked by electrical supply houses.
Carlon ENT (Home Depot / ABB Distribution)
Carlon ENT is also distributed through major retailers like Home Depot, offering blue ENT coils in various lengths and diameters for both contractors and DIY installers.
Generic HDPE Corrugated Loom Tubing (Amazon and others)
While not technically ENT, many installers use HDPE corrugated wire loom in blue or orange as an alternative for low‑voltage pathways. These are flexible, non‑split or split looms available in 1″–1.5″ diameters. They are not rated the same as ENT but are popular for AV and data cabling.
Commercial Rack Designs
Setting up a commercial AV and network rack is a meticulous process that blends engineering, organization, and foresight. Whether you're outfitting a boardroom, campus, or retail space, the goal is to create a reliable, scalable, and serviceable infrastructure that is specific to the requirements and design of each client.
1. Planning & Design
-
Needs Assessment: Identify AV systems (audio, video, control, signage) and networking requirements.
-
Rack Elevation Diagrams: Visualize equipment placement, airflow zones, and cable paths.
-
Space & Access: Choose a location with proper ventilation, security, and technician access.


03
Future
Pending
04
Future
Pending
